Digital Collage
Option 1: Basic Level
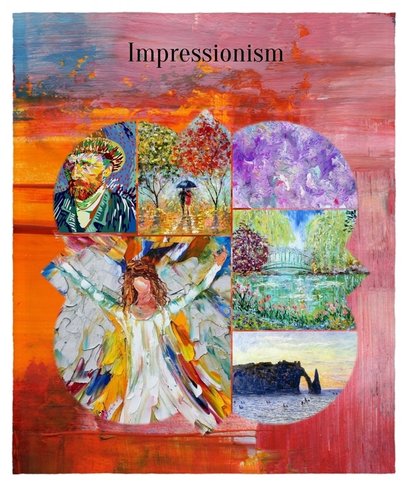
Choose an art movement and create a collage of different examples of pictures of it using the website collage.com
Art Movement Examples
Abstract Expressionism
Art Deco
Barque
Constructivism
Cubism
Dada
Expressionism
Fauvism
Futurism
Impressionism
Op-Art
Photorealism
Pointillism
Pop Art
Post-Impressionism
Renaissance
Rococo
Romanticism
Surrealism
Directions:
Go to collage.com
Click the blue button that says "Start your project"
Click the green arrow that says "Choose product"
On the left side is where you add content
Add at least 5 pictures and text stating what your art movement is
You also explore other tools such as backgrounds, and templates.
Click the green arrow that says "Next" to save your project and email it to me at
[email protected]
*When using pictures online always be aware of copyright and creative commons usage.
*Note: Most (but not all) historical artwork is under public domain and is free to use.
Example Product
Option 2: Advanced Level
Manipulating Digital Images*
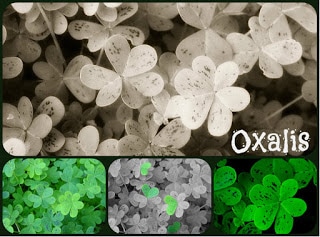
Choose one photo to manipulate into 3 additional images, then combine all 4 into a collage.
Image 1: Changing to black and white and adding text
Image 2: Manipulating the color in an image
(Optional) Another way to accomplish this task is by downloading the desktop version of Pixlr. It is a much more powerful photo editor.
Image 3: Change contract or brightness and crop
Image 4: Creating the collage
When finished email your collage to [email protected]
*Lesson as taught by Dr. Jennifer Weible in EDU 642
Choose one photo to manipulate into 3 additional images, then combine all 4 into a collage.
Image 1: Changing to black and white and adding text
- Find an image online that you like. Make sure that the copyright allows for editing the image.
- Go to Pixlr on your browser, and scroll down to choose "Pixlr Express" and click "Launch Web App." Then you can upload your photo. Click "Browse" if you saved your photo to the computer, or click "Open URL" if you found it online. Tip: Some definitions of tools in Pixlr are given on this website.
- Once your photo is uploaded, click on effect, then too old. Select a black and white filter that you like. Click Apply.
- To add text, at the bottom of the page click Type. Select a font. Type your text in the text box. Click on the text and move it to the desired location. Click Apply.
- Click Save. Change the name to the photo name and a number. Select the image quality. Click Save.
Image 2: Manipulating the color in an image
- There are two ways to use Pixlr to manipulate color without simply changing tones. First, upload the original image.
- Click on Adjustment.
- Then select Splash. The photo is changed to black and white.
- At the bottom of the page, there is a "magic" dropper icon that will select a color area for you, or you can click on the brush to add color to specific areas.
(Optional) Another way to accomplish this task is by downloading the desktop version of Pixlr. It is a much more powerful photo editor.
- Open Pixlr after installing on your computer
- Open the image.
- Click Fast then click Splash.
- Click on the center "pen", then change the brush size to make it smaller.
- Outline the area that you want to retain color (or change color).
- Use the "rainbow" slider to change the color if you wish.
- Click apply, then save.
- Remember to change the name of the image
Image 3: Change contract or brightness and crop
- Upload photo to Pixlr.
- Select Adjustment, then Contrast. Move the sliders to get the effect that you want for both brightness and/or contrast.
- Click Apply
- Click Crop.
- Click and drag the small squares on the corners to select the area that you want to keep in the photo.
- Click Apply.
- Save and name your photo.
Image 4: Creating the collage
- Go to Pixlr.com (use the online express version) and choose collage.
- Select a type and layout.
- Click on each opening in the layout to load a photo.
- When you are finished tweaking, click finished.
- Save.
When finished email your collage to [email protected]
*Lesson as taught by Dr. Jennifer Weible in EDU 642
Example Product